Updated July 20, 2016
Connecting React Native and Meteor
Originally publish on medium.com.
A question I commonly get when discussing my React Native Meteor boilerplate is in regards to what is actually going on with the two apps. How are things set up?
This is a great question and will make debugging any issues you have much easier. I‘ve covered this in the past but that post is now outdated and I wanted to make a proper update that accurately represents the tools I use today to build apps with React Native and Meteor.
So today we’ll cover:
- Creating the Meteor App
- Creating the React Native App
- Making the two talk to each other
- Using Meteor Methods
- Using Pub/Sub
If you just want to quickly get started then check out the boilerplate. If you want to know what’s going on behind the scenes (you should) then continue on!
Creating The Meteor App
Our Meteor app is going to be extremely simple and won’t have anything in terms of a web interface. We’ll be using it purely as a server.
First thing you’ll want to do is create the Meteor app, this assumes you already have Meteor installed on your machine
meteor create RNMeteorDemo && cd RNMeteorDemoOnce we’re in there we’re going to create a new mongo collection, which we’ll use later.
mkdir -p imports/api && touch imports/api/items.jsimports/api/items.js
import { Mongo } from 'meteor/mongo';

const Items = new Mongo.Collection('items');

export default Items;
Then we need to make sure we load that file (comes into play a bit later).
server/main.js
import { Meteor } from 'meteor/meteor';
import '/imports/api/items';

Meteor.startup(() => {
  // code to run on server at startup
});
That’s it on the Meteor side, for now! Make sure to run meteor so the Meteor server starts.
Creating the React Native App
Now we need to create our React Native app. We’ll do so via the following command in a fresh terminal window.
react-native init RNDemoThis one will likely take a few minutes to install, once it’s done the first thing we’ll do is install another package from npm
cd RNDemo/ && npm install --save react-native-meteorAnd this is where the deviation from my original article comes in. Since that publication the react-native-meteor package has been published and it handles a significant amount of the work for us.
Now, as I did in the boilerplate, we’ll create an app/ directory to store all of our code, allowing us to start reusing code from the beginning.
mkdir app/ && touch app/index.jsNow I’m not going to go into much detail beyond (like covering file structure) because it’s beyond the scope of the article. Check out the boilerplate for that.
So once that’s done let’s get our cross platform code working. For both index.ios.js and index.android.js we’ll want the following.
index.ios.js, index.android.js
import { AppRegistry } from 'react-native';
import App from './app/index';

AppRegistry.registerComponent('RNDemo', () => App);
Then in app/index.js we’ll actually start putting together our app. This first snipped is just bare bones React Native.
app/index.js
import React, { Component } from 'react';
import { StyleSheet, Text, View } from 'react-native';

class App extends Component {
  render() {
    return (
      <View style={styles.container}>
        <Text style={styles.welcome}>Welcome to React Native + Meteor!</Text>
        <Text style={styles.instructions}>We will use this soon</Text>
      </View>
    );
  }
}

const styles = StyleSheet.create({
  container: {
    flex: 1,
    justifyContent: 'center',
    alignItems: 'center',
    backgroundColor: '#F5FCFF',
  },
  welcome: {
    fontSize: 20,
    textAlign: 'center',
    margin: 10,
  },
  instructions: {
    textAlign: 'center',
    color: '#333333',
    marginBottom: 5,
  },
});

export default App;

Okay, there’s our basic React Native app. Let’s get the two talking.
Making the two talk to each other
This is where we’ll leverage react-native-meteor, which we installed earlier into our React Native App. First thing we have to do is call the Meteor.connect function, this is something that differs from on the web.
app/index.js
import React, { Component } from 'react';
import { StyleSheet, Text, View } from 'react-native';
import Meteor from 'react-native-meteor';

const SERVER_URL = 'ws://localhost:3000/websocket';

class App extends Component {
  componentWillMount() {
    Meteor.connect(SERVER_URL);
  }

  // Removed for brevity
}

// Removed for brevity

export default App;
A note about the SERVER_URL variable. You’ll need to change that depending on what platform you’re currently testing on and the environment you’re in. So, if you’re developing for the iOS simulator you’re in luck! You can use ws://localhost:3000/websocket. If you’re testing on an iOS device, Android device, or Android emulator you’ll have to use your machines IP address rather than localhost, such as ws://192.168.1.70:3000/websocket.
If you’re deploying your app you’ll want to change that to point to your server url, such as ws://my-app.meteorapp.com/websocket
Awesome, now your app should be connected to the meteor server! Check the console in Chrome and make sure you see Connected to DDP server.

Using Meteor Methods
So you’re connected to the server, let’s actually do some stuff! First thing we’ll do is create a new post on our server. To do that we’ll leverage a Meteor Method.
So, just like you would in “normal” Meteor, we’ll define a new method. I’ll be doing this is RNMeteorDemo/imports/api/items.js
RNMeteorDemo/imports/api/items.js
import { Mongo } from 'meteor/mongo';
import { Meteor } from 'meteor/meteor'; // ADD THIS

const Items = new Mongo.Collection('items');

// ADD THIS
Meteor.methods({
  'Items.addOne': ({ name }) => {
    return Items.insert({ name });
  },
});

export default Items;
Boom! That’s it on the Meteor side, let’s go to React Native. First thing we’ll do is setup a button.
RNDEMO/app/index.js
import React, { Component } from 'react';
import {
  StyleSheet,
  Text,
  View,
  TouchableOpacity, // ADDED
} from 'react-native';
import Meteor from 'react-native-meteor';

const SERVER_URL = 'ws://localhost:3000/websocket';

class App extends Component {
  componentWillMount() {
    Meteor.connect(SERVER_URL);
  }

  // ADDED
  handleAddItem() {
    console.log('TODO: Handle Add Item');
  }

  render() {
    return (
      <View style={styles.container}>
        {/* Removed for brevity */}
        <TouchableOpacity style={styles.button} onPress={this.handleAddItem}>
          <Text>Add Item</Text>
        </TouchableOpacity>
      </View>
    );
  }
}

const styles = StyleSheet.create({
  // Removed for brevity
  button: {
    padding: 10,
    backgroundColor: '#c5c5c5',
  },
});

export default App;
Okay, let’s actually use the Meteor Method now. It’s really simple, especially if you’re already familiar with Meteor. We just need to call Meteor.call. All the work here will take place in the handleAddItem function we defined in the last step.
index.js
handleAddItem() {
  const name = Math.floor(Math.random() * 10); // just generate some random number
  Meteor.call('Items.addOne', { name }, (err, res) => {
    // Do whatever you want with the response
    console.log('Items.addOne', err, res);
  });
}
So, if things are set up you should see something similar in your log when you press the button.

Using Pub/Sub
So that’s pretty standard, but what about the Pub/Sub system Meteor has set up for you? Well if you wan to use it it’s pretty simple. I’ll demo it by showing the real time count of Items in the database, which we can modify by pressing the “Add Item” button.
Using pub/sub in React Native is a little bit different - mainly how you actually access the collections. In Meteor you could normally use the same variable, Items, on both the server and client because you defined your collection in both places. When accessing the data on React Native it’s aware of the data but not the variable you assign it to so we need to access it via Meteor.collection(<COLLECTION_NAME>). Also of note is that the data you’re accessing via a find is returned as a normal array rather than a cursor so .count won’t work but .length will. Let me just show you…
First we need to actually publish the data from Meteor. Again we’ll go to RNMeteorDemo/imports/api/items.js
items.js
import { Mongo } from 'meteor/mongo';
import { Meteor } from 'meteor/meteor';

const Items = new Mongo.Collection('items');

Meteor.methods({
  'Items.addOne': ({ name }) => {
    return Items.insert({ name });
  },
});

// ADD THIS
Meteor.publish('items', () => {
  return Items.find();
});

export default Items;
If you get a warning about autopublish from Meteor just go ahead and remove it, meteor remove autopublish.
Then we need to import createContainer from react-native-meteor.
import Meteor, { createContainer } from 'react-native-meteor';Now let’s connect our component to Meteor, this should look familiar to the Meteor + React users.
RNDemo/app/index.js
// Removed for brevity

export default createContainer(() => {
  Meteor.subscribe('items');
  return {
    count: Meteor.collection('items').find().length,
  };
}, App);
All we’re doing there is subscribing to the publication and then accessing the data in the way react-native-meteor works. Of not is that inside the Meteor.collection call we used the same name as when we created our Mongo collection on the server.
Now let’s show that data in the UI
RNDemo/app/index.js
// Removed for brevity

class App extends Component {
  // Removed for brevity

  render() {
    return (
      <View style={styles.container}>
        <Text style={styles.welcome}>Welcome to React Native + Meteor!</Text>
        <Text style={styles.instructions}>Item Count: {this.props.count}</Text>

        <TouchableOpacity style={styles.button} onPress={this.handleAddItem}>
          <Text>Add Item</Text>
        </TouchableOpacity>
      </View>
    );
  }
}

// Removed for brevity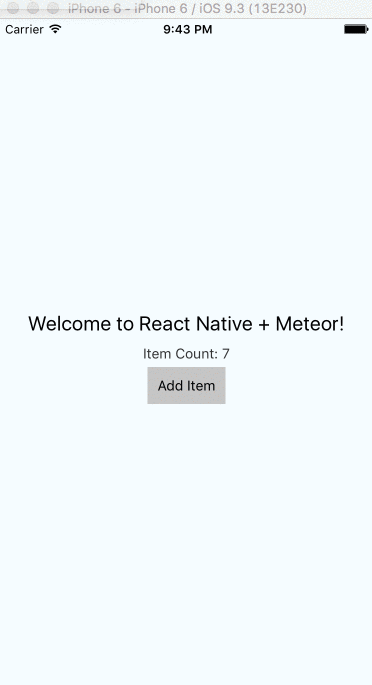
And that’s all, folks! It’s a basic one but if you’re looking into the first steps of integrating React Native and Meteor I hope this helped you!
Learn React Native + Meteor
Due to popular demand I’ve put together a comprehensive course on using React Native and Meteor to build high quality applications. If this is something you would be interested in I, and nearly 300 other students, would love to have you!
